
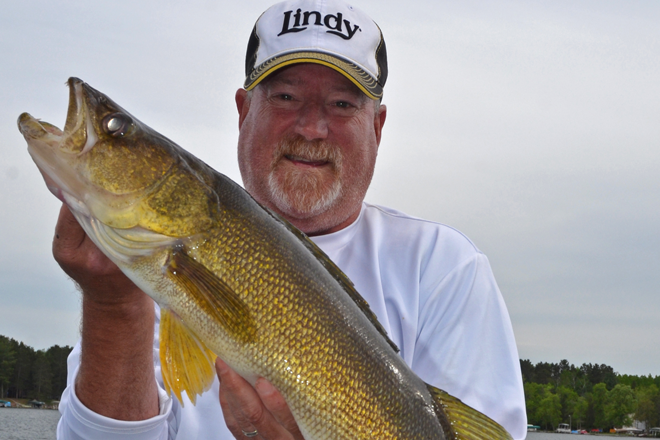
Fishing Article: Wiggle Worm Walleye 101, How To Catch Walleyes Using Jeff Sundin's Favorite Summer Presentation
 If you've been following my fishing reports for a while, then you already know that one of my favorite mid-summer presentations for Walleye is the jig and night crawler.
It all started years ago when I was trying to help my two daughters catch fish over rocky reefs without getting snagged. I dug through my box of prototypes and tied on some little bitty jigs that were so light that they’d never reach the snag infested, rock strewn bottom. I added whole night crawlers which gave the light jigs even more float and cast them out to see what would happen.
WHAM! Not only did this solve the problem of getting snagged, but the fish loved the presentation and my little girls caught lots of good fish. I could hardly wait to try them again and when we returned home, I used them on a guide trip and they worked like a charm here too.
I've been using the presentation ever since and they have put many a fish in my boat during the warmest days of summer.
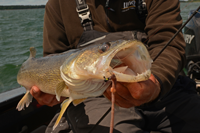
On one fishing trip with my friend Larry Lashley, this presentation was working particularly well and that’s what led to his coining of the phrase "Wiggle Worming". Not only does the name have a nice ring to it, but it is the perfect description for what the bait looks like when it swims through the water.
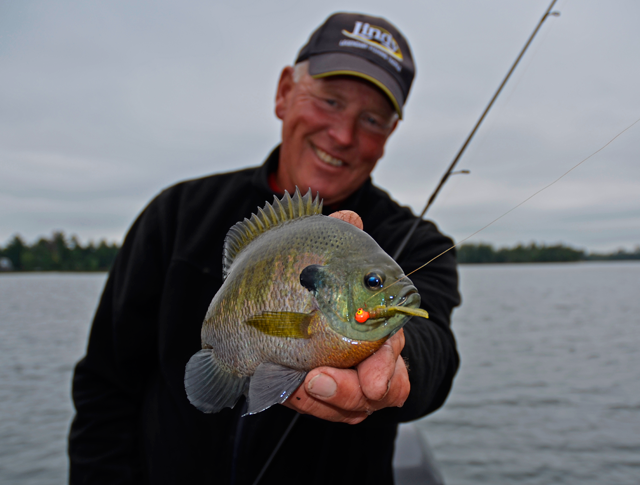
The swimming action imparted by constant wiggling of the fishing rod, makes the night crawler look alive and it is this wigging action that turns the heads of hungry Walleye, Bass and Panfish.
 Simplicity is this presentation’s feature benefit, but it gets another gold star for versatility as well. Wiggle Worms can be fished in almost any type of cover. The light weight wiggles gently through weeds, over the top of rocks and other snag-filled waters. Despite the light weight, properly rigged wiggle worms can be fished in deep water too, we've wiggle wormed our way to success in water depths of up to 30 feet.
From my point of view, properly rigged” means that I have combined the correct fishing rod and the right line weight for presenting the light, 1/16 to 1/8 ounce jigs.
I am a big fan of light line and all of my jigging rods are strung with 4 pound test line. The line I use happens to be stronger than most of the more popular brands 4 pound test offerings. In a pinch, I will substitute some 6 pound test lines, but never heavier.
In my opinion, the ultra-sensitive, no-stretch super braided lines are to be reserved for experts. If you consider yourself an expert angler who can interpret the heightened sensation of every nibble and can manage the line flapping around in strong winds, then it might be okay for you.
But I LIKE stretch in my Walleye fishing line, it helps me catch more fish, especially when they are in a sensitive mood.
For me, super lines are reserved for applications that require the use of no stretch line. I have it on my Pike rods, my Bass rods and even on some of my ice fishing rods. But I avoid using it for Walleye fishing because of its inability to stretch, there’s no safety cushion to help me to avoid spooking light biting fish.
I don’t always buy the same brand name fishing rod, but I do ALWAYS make sure that any fishing rod is rated for the line and lure weights that I plan to use. If the rod does not have these ratings printed on it, I don’t buy it.
Most 6-1/2 to 7 foot Light Action Rods that are rated for 1/16 to 1/8 ounce lures and 4 to 6 pound test line will serve the purpose. My current favorite is actually considered a Panfish rod; it’s a 6’ 10” 1 piece rod that’s rated for 2 to 6 pound test line and 1/32 to 1/8 ounce lure weights. There numerous alternatives and if yours is a little bit heavier, but lies within the 4-6 pound test range, then it will most likely work fine.
 I am a huge fan of my own jig design, so these days, I always start with Lindy's 1/16 Live Bait Jig. I like the wide gap hook because it allows me to release a higher percentage of fish without harming them. However, standard round head jigs like the 1/16 ounce Lindy Jig will work too. In fact, so will other light weight jigs like the 1/16 ounce Little Nipper. These feather jigs add a unique look to this presentation and occasionally, I’ll use them to add extra flair.
Of course, you’ll need a box of healthy night crawlers and one you have ‘em, your setup is complete; now on to the presentation.
Whenever one of my fishermen asks how they will know when their lure is in the right place, I tell them; "All you need to do is cast the jig into the lake, relax and have faith". By design, this presentation intentionally eliminates contact with the bottom. Wiggle Worming allows your bait to dance around weeds, skip over rocks and land softly on the lips of a fish. It is a finesse presentation and is not supposed to be a “bull in a china shop” style presentation like rip-jigging or other more agressive styles. The lure is intended to float above the fishes line of sight, where they can see it, so feeling your lure on the bottom would actually work against you.
Many fishermen have been dramatically over trained and work way too hard at keeping their fishing lures on bottom. Just remember, this rig will definitely get your bait into the strike zone, I promise it will, just have faith.
 Long liners will love using this presentation because of it similarity to long-line Lindy Rig Fishing. We control our lures depth by controlling both controlling our boats speed and controlling the amount of line we feed out.
When you maintain your position on structure and hold your boat's speed in the .4 to .7 MPH range, this presentation will work for you. Experiment with distances, but don’t work too hard at feeling the bottom, if you are, it will work against you.
Like the name implies, wiggle worming means that if you keep your rod tip moving, your worm will wiggle. Imagine a happy dog, gently wagging its tail; this will give you an idea of what your rod tip should look like. It should be moving constantly, but gently and without interruption.
I allow the rod to rock gently in my hand, the motion should is effortless. If it feels like you're working at it then you're overdoing it. Bring the worm within range and watch; if it’s rolling in a circular motion as you swim it, then you’re doing it correctly.
Once you feel a fish pick up the bait, feed out line just like you would when you're using a Lindy Rig. Allow the fish ample time to inhale the entire crawler, reel up all of your slack line and when the rod tip loads up, set the hook.
OH and by the way, send pictures!
 Join And Become A Duly Deputized Fishrapper Cub Reporter
Helping your fellow fishermen and women stay abreast of the fishing conditions in your area is good for everyone and it's easier than you think!
Fishing Reports Minnesota is the Facebook counterpart to this page and it's open to the public. Be like me, become a duly deputized "Cub Reporter" and post your own pics and comments. If it's good for fishing, then it's Good For Everybody!